
Tuesday, December 11, 2012
Daily Ornament Day 11
Today's ornament is based on this tutorial. I used doubled-sided patterned paper and 12 circles instead of the 9 used in the tutorial. I think it makes for a much fuller ornament.

Monday, December 10, 2012
Daily Ornament Day 10
Today's ornament was made by following this tutorial. The only change I made was to randomly stamp in silver ink all over the ornament. This is basically the same type of ornament as Day 5 and Day 8, just using a different shape and 4 of the shapes instead of 8 or 10. This one would also be pretty cool if you used 6 or 8, but it was hard enough getting the shapes to line up correctly with just 4. Even though I had printed lines to cut, I was off a bit in several places so I had to go back and trim a bit here and there. Overall, I think it came out pretty good.

Sunday, December 9, 2012
Daily Ornament Day 9
For today, I made three ornaments since they are all very simple.

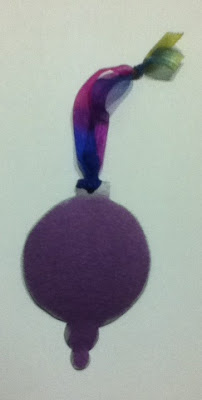
It's hard to tell in the photo, but the purple one is made of cardstock that has a bit of a sheen to it. It's not glittery, but pearlescent maybe? I inked the edges with silver ink and added a ribbon hanger.
The blue flowered on is cut from a piece of Tim Holtz paper. It's basically the same as the purple one, except I used blue ink on the edges.

The black and white one is just the shape, covered with washi tape. Actually, to be specific, it's SMASH tape. I inked the edges of this one with silver ink.

So that's it for today. Nothing spectacular, just quick and easy. The longest part was cutting them out. If you had a die cut machine or one of the electric cutting machines, you could make a tree full in a very short amount of time. You could add bows or other embellishments. They could also be used as gift tags on presents.

It's hard to tell in the photo, but the purple one is made of cardstock that has a bit of a sheen to it. It's not glittery, but pearlescent maybe? I inked the edges with silver ink and added a ribbon hanger.

The blue flowered on is cut from a piece of Tim Holtz paper. It's basically the same as the purple one, except I used blue ink on the edges.

The black and white one is just the shape, covered with washi tape. Actually, to be specific, it's SMASH tape. I inked the edges of this one with silver ink.

So that's it for today. Nothing spectacular, just quick and easy. The longest part was cutting them out. If you had a die cut machine or one of the electric cutting machines, you could make a tree full in a very short amount of time. You could add bows or other embellishments. They could also be used as gift tags on presents.
Saturday, December 8, 2012
Daily Ornament Day 8
Today's ornament is basically the same as the one from Day 5. I just used a different shape and alternated the snowflake paper with a solid blue, and added some beads.

Friday, December 7, 2012
Daily Ornament Day 7
Today's ornament was made following this tutorial. I used some pages from an old hymnal. Since I knew some of the words would show, I used Christmas carols. To finish it, I added a ribbon hanger and a paper flower I made a while back.
The paper I used was really thin and it was more difficult to put together than one I made in the past out of a magazine page. I think the problem might have been the thickness of the paper. So if you decide to try one, I really do recommend thicker paper. It doesn't have to be really thick- even cheap printer paper is thicker than what I used.

The paper I used was really thin and it was more difficult to put together than one I made in the past out of a magazine page. I think the problem might have been the thickness of the paper. So if you decide to try one, I really do recommend thicker paper. It doesn't have to be really thick- even cheap printer paper is thicker than what I used.
Thursday, December 6, 2012
Daily Ornament Day 6
You ever have one of those projects that just doesn't turn out quite right? This ornament was a lot cuter in my head. It looks more like a coaster than something you'd hang on a tree, but I still kind of like it. It was simple to make. I covered a square of cardboard with black paper, glued on the poinsettia picture and added the bead trim. The bead trim was the only difficult part, and if you look, you can see it's not particularly well done. It kept moving around before the glue was dry. Oh, well!

Wednesday, December 5, 2012
Daily Ornament Day 5
Today's ornament is another very simple one. It's just ten circles, folded in half and glued together, with a bit of ribbon put in before gluing the first and last together.
I originally intended to add beads on the ribbon, but I'm trying to only use supplies I already have on hand. I rarely buy beads unless they are for a specific project, so I didn't have anything suitable in my stash.
I probably should have inked the edges of the circles, and I may still go back and do it. I think it looks a little unfinished.
I've got plans for a more complicated version of this ornament later on.

I originally intended to add beads on the ribbon, but I'm trying to only use supplies I already have on hand. I rarely buy beads unless they are for a specific project, so I didn't have anything suitable in my stash.
I probably should have inked the edges of the circles, and I may still go back and do it. I think it looks a little unfinished.
I've got plans for a more complicated version of this ornament later on.
Subscribe to:
Posts (Atom)