
Tuesday, December 4, 2012
Daily Ornament Day 4
I feel like I'm cheating a bit with today's ornament- I actually made it a few years ago and just added the loop for hanging today. It was mostly made with various punches, except for the antlers, which were made with a Cuttlebug die set called Ornamental.

Monday, December 3, 2012
Daily Ornament Day 3
Today's ornament is very simple, just strips of paper and a couple of brads. The strips I used were 1/2 inch by 5 1/2 inches. I used 12 strips of paper. You can alternate colors as I did, or use all the same color or pattern. I punched a small hole in each end of the strips. I put one brad all the way through the holes on one end of the stack. Then I pulled each strip up one at a time and put them on the other brad and added a loop of metallic thread as a hanger and all done!
This ornament could definitely be embellished with a bow at the top or some beads on the hanger or hanging from the bottom or many other ways. I decided not to get too fancy this early in the month. Later on, if I run out of ideas, I may make another version of this one.

To see the rest of my December Daily Ornament series, click here.
This ornament could definitely be embellished with a bow at the top or some beads on the hanger or hanging from the bottom or many other ways. I decided not to get too fancy this early in the month. Later on, if I run out of ideas, I may make another version of this one.
To see the rest of my December Daily Ornament series, click here.
Sunday, December 2, 2012
Daily Christmas Ornament Day 2
Today's ornament is a very simple paint chip Christmas tree. I saw something similar on Pinterest and thought I would give it a try. I almost put a magnet on the back instead of a ribbon because it seems a bit strange to hang a Christmas tree on a Christmas tree, but as you can see, I went with the ribbon. I think it turned out very cute and it's definitely something kids could do.

Find Day One here.
Find Day One here.
Saturday, December 1, 2012
Christmas Ornaments Everyday! Day One
I do something creative every day, and for December, I plan to make Christmas ornaments (or other decorations) each day. It's kind of an odd choice as we don't have a tree up and won't unless I make one. Most everything will be made of paper, and who knows how well they'll last in storage. But, it gives me something to do. I intend to try to only use supplies I already have on hand, but we'll see how that goes. I'll probably end up using this as an excuse to buy things.
Today, I've made this paper ornament by loosely following this tutorial. The main differences are that I alternated solid red and green paper instead of using patterned paper, and the paper I used was 8 1/2 x 11, so my strips were 11 inches instead of 12. It's still a good sized ornament. The stamp I used for the center is one by Mary Engelbreit that I have had for a long time- more than ten years, now that I think about it. I have quite a few stamps that I've never used, but I've used this one over and over because I just really like it.
I think the ornament turned out really well. I do think it will be a bit difficult to store- it's more than five inches across, so I'm not sure what I'll do with it. I'm worried the loops will get crushed. But it was very quick to make. In fact the part that took the longest was coloring the stamped image.
This might be a good ornament to pick if you wanted to make a lot of them quickly. And if you had several people working on it, it would be easy to have an assembly line of sorts.
So, here's hoping I'll actually make an ornament everyday, at least 'til Christmas. I have ideas for the next few days, so I need to start brain storming for the rest of the month.
Today, I've made this paper ornament by loosely following this tutorial. The main differences are that I alternated solid red and green paper instead of using patterned paper, and the paper I used was 8 1/2 x 11, so my strips were 11 inches instead of 12. It's still a good sized ornament. The stamp I used for the center is one by Mary Engelbreit that I have had for a long time- more than ten years, now that I think about it. I have quite a few stamps that I've never used, but I've used this one over and over because I just really like it.
I think the ornament turned out really well. I do think it will be a bit difficult to store- it's more than five inches across, so I'm not sure what I'll do with it. I'm worried the loops will get crushed. But it was very quick to make. In fact the part that took the longest was coloring the stamped image.
 |
| I used glitter and metallic gel pens on various parts of the image, but it doesn't show up very well in the picture. |
This might be a good ornament to pick if you wanted to make a lot of them quickly. And if you had several people working on it, it would be easy to have an assembly line of sorts.
So, here's hoping I'll actually make an ornament everyday, at least 'til Christmas. I have ideas for the next few days, so I need to start brain storming for the rest of the month.
 |
| Here's a slightly better picture |
Sunday, November 25, 2012
My New Scarf
I've finally finished this scarf I've been working on off and on (mostly off) since last February! It's a bit less than five feet long. I wanted to go longer-maybe six feet, but I had a problem with my yarn and instead of trying to fix it, I just decided to leave it where it was. I also decided against fringe, but I can always add some later if I change my mind. The picture doesn't do the colors justice. The dark parts are actually purple and the rest is a lot more teal. I'll have to try to get a better picture tomorrow during the day.


Thursday, October 11, 2012
Beaded Bracelets!
I guess I've been neglecting this blog for a while. I haven't really done much that I felt like sharing. I do something creative every day, but a lot of times, it's just a tiny bit of a whole project or a doodle or something like that. When I finish my current art journal, I plan to do a flip through video. I only have 12 pages left that are in various states of completion. I'm not sure how long it will take to finish the journal; I tend to do just a layer or one section of a page at a time.
Anyway, today I felt like doing something different. I haven't made any beaded jewelry in years but I made two bracelets today. The blue one is just some beads on stretchy cord- nothing fancy. The one with green beads was made by following this tutorial. Mine came out a little wonky, but it is the first time I've tried this technique. I used hemp instead of waxed linen cord, as that is what I happened to have on hand. I haven't bought any new beading supplies in quite a while. I think they came out pretty well, considering I spent less than 30 minutes total making them.


Anyway, today I felt like doing something different. I haven't made any beaded jewelry in years but I made two bracelets today. The blue one is just some beads on stretchy cord- nothing fancy. The one with green beads was made by following this tutorial. Mine came out a little wonky, but it is the first time I've tried this technique. I used hemp instead of waxed linen cord, as that is what I happened to have on hand. I haven't bought any new beading supplies in quite a while. I think they came out pretty well, considering I spent less than 30 minutes total making them.


Tuesday, August 28, 2012
Altered Picture Frame
I had this picture frame that, while not horrible, it just wasn't my style.

I was originally planning on still using it as a picture frame, so I gessoed it, thinking I would paint and/ or collage on it.

After thinking about it some more, I decided that I didn't want to keep the picture frame part and thought I would cover it with paper- or something, and decided to fill in the holes with dimensional magic. I've got this really old bottle- like 15 years old, and it's all yellowed, so I try to use it whenever I know it won't matter.

Next step: After adding another layer of gesso, I inked around the edges with tea dye distress ink.

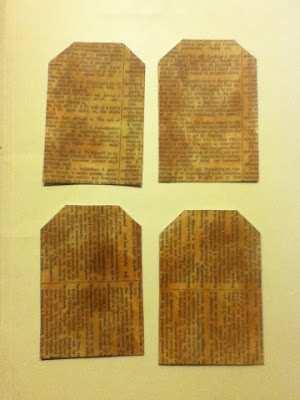
I cut some cardstock slightly smaller than each panel,

covered it with dictionary paper,

and inked them with tea dye distress ink.
At this point, I still wasn't sure where I was going with this, but I figured I'd just keep going and eventually I'd get somewhere. I stamped four butterflies, cut them out, and accented them with a Gelly Roll clear stardust glitter pen.

I glued them on, but I knew it would need something else.

I had these paper flowers I made a few weeks ago and thought I'd try them.

The finished product! I think it turned out pretty good. It's definitely more my style now.


I was originally planning on still using it as a picture frame, so I gessoed it, thinking I would paint and/ or collage on it.

After thinking about it some more, I decided that I didn't want to keep the picture frame part and thought I would cover it with paper- or something, and decided to fill in the holes with dimensional magic. I've got this really old bottle- like 15 years old, and it's all yellowed, so I try to use it whenever I know it won't matter.

Next step: After adding another layer of gesso, I inked around the edges with tea dye distress ink.

I cut some cardstock slightly smaller than each panel,

covered it with dictionary paper,

and inked them with tea dye distress ink.

At this point, I still wasn't sure where I was going with this, but I figured I'd just keep going and eventually I'd get somewhere. I stamped four butterflies, cut them out, and accented them with a Gelly Roll clear stardust glitter pen.

I glued them on, but I knew it would need something else.

I had these paper flowers I made a few weeks ago and thought I'd try them.

The finished product! I think it turned out pretty good. It's definitely more my style now.
Subscribe to:
Posts (Atom)