Tuesday, December 25, 2012

Daily Ornament Day 25

Merry Christmas! Today is the last of my daily ornament series, and quite frankly, I'm glad it's done. 25 posts in 25 days is a lot for me, considering I had one post in November, one in October, and before that it was August when I last posted anything.

Today's ornament is something that I might do every year. The ornament itself is basically the same as Day 6 and Day 16, but this time I used a picture of my nephew Andrew.


I liked the idea so much, I also made one with a picture from last year.


I didn't try to match the papers I used because there is no way I'll remember to save certain paper just for that, but you could make a bunch (18? or more?) of blank ones and just add a picture every year and you'd have a matching set!

Monday, December 24, 2012

Daily Ornament Day 24

Today's ornament is one of my favorites. I think it's really cute. There are a lot of tutorials for making paper rosettes but I'll quickly explain how I made mine. I started with a strip of white cardstock, 12 x 1 1/2 inches. I used a border punch along one edge. Then I accordion folded the strip- it's probably about 1/4 inch sections, but I did it so it would match up with the pattern of the border punch. I glued the ends together. The next part is a bit tricky and a little hard to explain. You have to flatten the folded strip and hold it flat while gluing a circle of cardstock to the center to make it stay down. I used a circle on both sides; I'm not sure if it was necessary but it worked for me. The glue I used took a really long time to dry so I had to hold it flat until the glue set. It kept wanting to pop back up.

To decorate it, I added a red circle to the center and a die-cut gingerbread man that I embellished with white gel pen. I've had the die-cut for 14 or 15 years - back when no one had their own personal machines and you'd buy themed packs of die-cuts at the craft store. (Yes, I do have hoarder tendencies but I was right! I did find a use for it. Now to find uses for all the rest.) I wove ribbon through the holes from the border punch, leaving a loop for hanging at the top, and tied a bow at the bottom.

I really like how this turned out, except for the lopsided bow. I can never tie a pretty bow.

Sunday, December 23, 2012

Daily Ornament Day 23

Today's ornament comes from the Creative Studio at hp.com, specifically this project. It was a little awkward to put together as there were no instructions, but I found a similar project that did have instructions and followed those where I could and improvised the rest. The result is a 3-D bird with moveable wings that can stand on it's own if you want, or you can add a ribbon for hanging.

Saturday, December 22, 2012

Daily Ornament Day 22

Today's ornaments were inspired by my Charlie Brown ornaments from Day 20. I thought they were really cute and I wanted to do another cartoon. Danger Mouse was always a favorite. In fact my dog's full name is Annabelle Dangermouse.

These ornaments are hand-cut paper with some drawn details. And I think they're awesome. I want to make some magnets like this for my fridge.


Friday, December 21, 2012

Daily Ornament Day 21

Today's ornament comes from the fact that I've been keeping the scraps and leftovers from all these ornaments in a box on my desk. I was playing around with some pieces of toilet paper roll left over from Day 19 when I realized what I was doing looked kind of cool. I glued it together and sprayed it with Glimmer Mist, because I thought it needed some sparkle.


I also made another one, but it didn't turn out as cute. It looked great until I took it apart to glue it, and couldn't remember exactly how it had been put together. I played around with it for a while, but finally gave up. I still can't figure out what I did differently.


Thursday, December 20, 2012

Daily Ornament Day 20

Today's ornaments, while technically ornaments, were used as name tags on my brother's Christmas gifts. I saw something similar done in felt, which were themselves inspired by a set of ornament shaped cookies.

They are made of paper, with a jump ring at the top which I used to tie onto the package with ribbon. I think they came out really cute and I may make more from different TV shows or movies.


Wednesday, December 19, 2012

Daily Ornament Day 19

For today, I made two versions of the same ornament, just decorated differently. It's a snowflake made from a (empty) toilet paper roll. I've seen them on various blogs and Pinterest. I didn't follow a tutorial, so I don't have one to link to, but I'll explain what I did. Basically, I just flattened an empty toilet paper roll (you could also use a paper towel roll), cut it into strips (mine are about 1/2 an inch but if I was doing it again, I'd go a bit thinner), painted the pieces, hot glued them together, and embellished them a bit.

For the first one I glued a brad in the center and outlined the edges of each piece with a Gelly Roll clear stardust pen. It's very subtle (and impossible to get a good picture of) but you can see it when the light hits it just right. You could also use glitter, but I rarely do- it's just too messy.


For the second one, I glued on some rhinestones, one in the center and one on the tip of each arm.


This is a really easy craft that can be as simple or elaborate as you want. To see a really awesome example (made by someone else) click here.


Tuesday, December 18, 2012

Daily Ornament Day 18

Today's ornament came from this tutorial. It was a lot harder than I was expecting and I'm pretty sure I didn't get it quite right, but it makes for an interesting ornament.


Monday, December 17, 2012

Daily Ornament Day 17

Today's ornament is a 3-D star made by following this tutorial. I used regular copy paper to try out the technique and decided I liked the look of the white paper. Before I glued the two pieces together, I used Glimmer Mist in Iridescent Gold to give it some sparkle. The paper was a little thin for the amount of Glimmer Mist I used- I can be a bit heavy handed with it. I was afraid it would collapse into a soggy, glittery mess, but it dried all right and I think it turned out pretty cute.


It's hard to see the shimmer, so here's a close-up to give you an idea.


Sunday, December 16, 2012

Daily Ornament Day 16

Today's ornament features a picture of my dog, Annabelle, looking very unhappy in her Christmas dress. I just covered a square of cereal box cardboard with Christmas paper, glued on the picture, and added a ribbon. Very simple, and you can use any picture, even something out of a magazine if you want. I printed the picture at 2 1/2 inches and the cardboard square is about 3 inches.


Saturday, December 15, 2012

Daily Ornament Day 15

Today's ornament is pretty simple, but really cute. I followed this tutorial. I didn't have any wobble eyes, so I used paper.


Friday, December 14, 2012

Daily Ornament Day 14

For today's ornament, I used the tutorial and template found here. 
I used sheet music instead of book pages. I got the sheet music from here.
I didn't use glitter like they did in the tutorial, mostly because glitter and I do not get along.
I think it's cute, and would look really good on a rustic tree, with a popcorn and cranberry garland- that sort of thing.

Thursday, December 13, 2012

Daily Ornament Day 13

Today's ornament was more difficult to put together than I was expecting, partly because I tried to get fancy and add beads, and partly because the thread I was using was too short for what I was trying to do. I got it together in the end even though it's not perfect. Then again, no one would believe I made it if it was perfect! I don't think you can see it in the picture, but I outlined the swirly pattern on the paper with a gelly roll clear stardust pen (which I absolutely love and use a lot).

The template I used is from here, although I didn't really follow the tutorial. I probably would have been better off if I had. But I like how it turned out.

Wednesday, December 12, 2012

Daily Ornament Day 12

I feel like I've cheated with today's ornament. It's actually a favor box that is a free printable from Paper Glitter. I don't know if I've said, but I'm doing these ornaments each day, not in advance, and I only have a list of vague ideas I'm working from. I just make whatever I feel like making that day. (Well, night. I've mostly been making the ornaments late at night, which is why these posts are going up very early each morning.) Anyway, tonight I have a headache and printing, cutting out, and putting together something that someone else made is about all the "creativity" I can stand.


Tuesday, December 11, 2012

Daily Ornament Day 11

Today's ornament is based on this tutorial. I used doubled-sided patterned paper and 12 circles instead of the 9 used in the tutorial. I think it makes for a much fuller ornament.

Monday, December 10, 2012

Daily Ornament Day 10

Today's ornament was made by following this tutorial. The only change I made was to randomly stamp in silver ink all over the ornament. This is basically the same type of ornament as Day 5 and Day 8, just using a different shape and 4 of the shapes instead of 8 or 10. This one would also be pretty cool if you used 6 or 8, but it was hard enough getting the shapes to line up correctly with just 4. Even though I had printed lines to cut, I was off a bit in several places so I had to go back and trim a bit here and there. Overall, I think it came out pretty good.


Sunday, December 9, 2012

Daily Ornament Day 9

For today, I made three ornaments since they are all very simple.


It's hard to tell in the photo, but the purple one is made of cardstock that has a bit of a sheen to it. It's not glittery, but pearlescent maybe? I inked the edges with silver ink and added a ribbon hanger.


The blue flowered on is cut from a piece of Tim Holtz paper. It's basically the same as the purple one, except I used blue ink on the edges.


The black and white one is just the shape, covered with washi tape. Actually, to be specific, it's SMASH tape. I inked the edges of this one with silver ink.


So that's it for today. Nothing spectacular, just quick and easy. The longest part was cutting them out. If you had a die cut machine or one of the electric cutting machines, you could make a tree full in a very short amount of time. You could add bows or other embellishments. They could also be used as gift tags on presents.


Saturday, December 8, 2012

Daily Ornament Day 8

Today's ornament is basically the same as the one from Day 5.  I just used a different shape and alternated the snowflake paper with a solid blue, and added some beads.


Friday, December 7, 2012

Daily Ornament Day 7

Today's ornament was made following this tutorial. I used some pages from an old hymnal. Since I knew some of the words would show, I used Christmas carols. To finish it, I added a ribbon hanger and a paper flower I made a while back.
The paper I used was really thin and it was more difficult to put together than one I made in the past out of a magazine page. I think the problem might have been the thickness of the paper. So if you decide to try one, I really do recommend thicker paper. It doesn't have to be really thick- even cheap printer paper is thicker than what I used.

Thursday, December 6, 2012

Daily Ornament Day 6

You ever have one of those projects that just doesn't turn out quite right? This ornament was a lot cuter in my head. It looks more like a coaster than something you'd hang on a tree, but I still kind of like it. It was simple to make. I covered a square of cardboard with black paper, glued on the poinsettia picture and added the bead trim. The bead trim was the only difficult part, and if you look, you can see it's not particularly well done. It kept moving around before the glue was dry. Oh, well!

Wednesday, December 5, 2012

Daily Ornament Day 5

Today's ornament is another very simple one. It's just ten circles, folded in half and glued together, with a bit of ribbon put in before gluing the first and last together.
I originally intended to add beads on the ribbon, but I'm trying to only use supplies I already have on hand. I rarely buy beads unless they are for a specific project, so I didn't have anything suitable in my stash.
I probably should have inked the edges of the circles, and I may still go back and do it. I think it looks a little unfinished.
I've got plans for a more complicated version of this ornament later on.


Tuesday, December 4, 2012

Daily Ornament Day 4

I feel like I'm cheating a bit with today's ornament- I actually made it a few years ago and just added the loop for hanging today. It was mostly made with various punches, except for the antlers, which were made with a Cuttlebug die set called Ornamental.


Monday, December 3, 2012

Daily Ornament Day 3

Today's ornament is very simple, just strips of paper and a couple of brads. The strips I used were 1/2 inch by 5 1/2 inches. I used 12 strips of paper. You can alternate colors as I did, or use all the same color or pattern. I punched a small hole in each end of the strips. I put one brad all the way through the holes on one end of the stack. Then I pulled each strip up one at a time and put them on the other brad and added a loop of metallic thread as a hanger and all done!
This ornament could definitely be embellished with a bow at the top or some beads on the hanger or hanging from the bottom or many other ways. I decided not to get too fancy this early in the month. Later on, if I run out of ideas, I may make another version of this one.


To see the rest of my December Daily Ornament series, click here.

Sunday, December 2, 2012

Daily Christmas Ornament Day 2

Today's ornament is a very simple paint chip Christmas tree. I saw something similar on Pinterest and thought I would give it a try. I almost put a magnet on the back instead of a ribbon because it seems a bit strange to hang a Christmas tree on a Christmas tree, but as you can see, I went with the ribbon. I think it turned out very cute and it's definitely something kids could do.


Find Day One here.


Saturday, December 1, 2012

Christmas Ornaments Everyday! Day One

I do something creative every day, and for December, I plan to make Christmas ornaments (or other decorations) each day. It's kind of an odd choice as we don't have a tree up and won't unless I make one. Most everything will be made of paper, and who knows how well they'll last in storage. But, it gives me something to do. I intend to try to only use supplies I already have on hand, but we'll see how that goes. I'll probably end up using this as an excuse to buy things.
Today, I've made this paper ornament by loosely following this tutorial. The main differences are that I alternated solid red and green paper instead of using patterned paper, and the paper I used was 8 1/2 x 11, so my strips were 11 inches instead of 12. It's still a good sized ornament. The stamp I used for the center is one by Mary Engelbreit that I have had for a long time- more than ten years, now that I think about it. I have quite a few stamps that I've never used, but I've used this one over and over because I just really like it.
I think the ornament turned out really well. I do think it will be a bit difficult to store- it's more than five inches across, so I'm not sure what I'll do with it. I'm worried the loops will get crushed. But it was very quick to make. In fact the part that took the longest was coloring the stamped image.

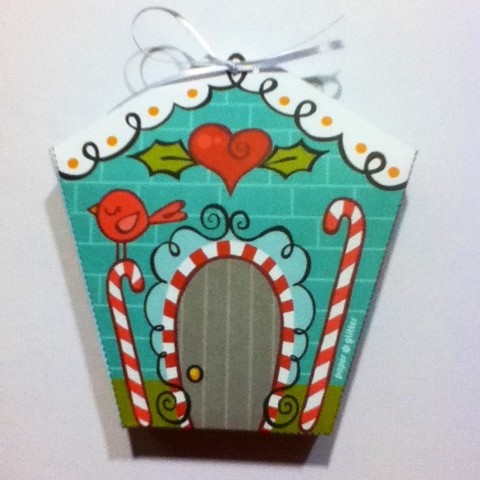
I used glitter and metallic gel pens on various parts of the image, but it doesn't show up very well in the picture.

This might be a good ornament to pick if you wanted to make a lot of them quickly. And if you had several people working on it, it would be easy to have an assembly line of sorts.

So, here's hoping I'll actually make an ornament everyday, at least 'til Christmas. I have ideas for the next few days, so I need to start brain storming for the rest of the month.


Here's a slightly better picture